
In the attempt to make the Taurus GX4 into a backup gun, I was confronted with the fact that, while factory sights are quite good, they could be more visible and the gun was shooting low at nearly every distance.
While searching for solutions to another sighting problem I had, I saw that XS makes their “Minimalist” sights for the Taurus GX4. These sights sit a little higher than factory sights. I requested a set and set about getting the necessary tools.
Attempting to remove the front sight was a chore. Based on its proximity to the front ring of the slide, its ca.-2mm screw holding the front sight in and a real inability to see what I was doing led to me using three different allen wrenches (none of which worked) – and believing I’d irretrievably burred the head of the screw, I contacted service at Taurus. I asked that they only remove the front sight.
Within the week, it was back and I had a new problem.
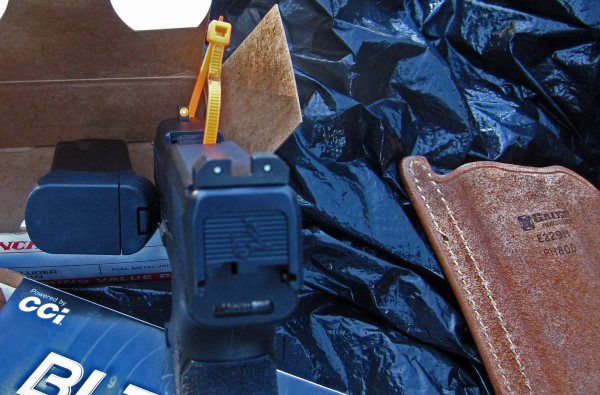
The “R3D” sights – in some contexts referred to as “Minimalist” – are notch and post sights. The front features a high contrast color – in the case of the sights that were sent, the front featured a photoluminescent orange “ball.” It’s also available in green, and they refer to the “ball” around the tritium vial as the “Glow Dot.”
The rear sight is serrated on the rear face and has two tritium vials with no accent rings around them. The tritium forward is more visible than the tritium in the rear.
I could do without anything on the rear sight, but the dimmer rear vials are fine.
I degreased the slide surfaces, the XS sight screw and sight. After that, I recognized that a standard size wrench for the 3/16th inch screw wouldn’t fit in the small space available in the GX4 slide. I had a specific slim-line nut driver that’s the right size, but it’s deep enough that I couldn’t engage the threaded short shank into the sight through the slide.
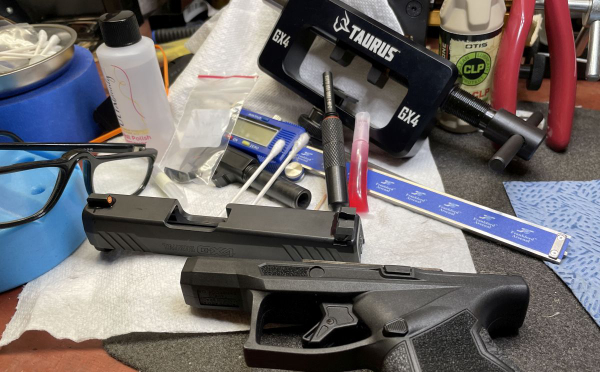
So, I started the sight screw with my fingers … don’t try this at home. I had some thread locker in the sight and on the threads already. After the nut started, it was simple to snug it up using the sight tool from Real Avid. Thread locker was applied to either side of the front sight and along the front of the front sight.
For the XS rear sight, I used the MGW Rear Sight Tool Taurus GX4 (available from shoptaurus.com). The tool fitting this specific handgun makes life very easy. I quickly fitted up the slide to the MGW tool and pressed the rear sight out. Getting the slide dismounted, I degreased the new rear sight and slide dovetail. It was a near-fit, going just short of a third of the way into the side. I checked both ends of the dovetail and it was tighter coming in from the left.
It was time to get the file out. Using instructions from XS, I carefully ran the bottom of the XS rear sight over the file six strokes with the sight’s right-side to the front. This was followed by the same procedure, reversing the sight to even the cut. Only the bottom of the sight was cut. There was no cutting on the slide.
It took a number of repetitions of filing, wiping, trying for fit before I had any progress.
After that, I was able to move the sight with some pressure on the MGW tool. I got it as close to center as possible.
I’d measured the front sight from the sides of the slide with my micrometer from Franklin Armory. Now it was time to measure unused dovetail on either side of the rear sight.
I centered it up then applied thread locker to the fit at the front and either side of the rear sight. After fifteen minutes of setting, I wiped up the excess thread locker with cotton swabs.
Two days later, the gun went to the range.
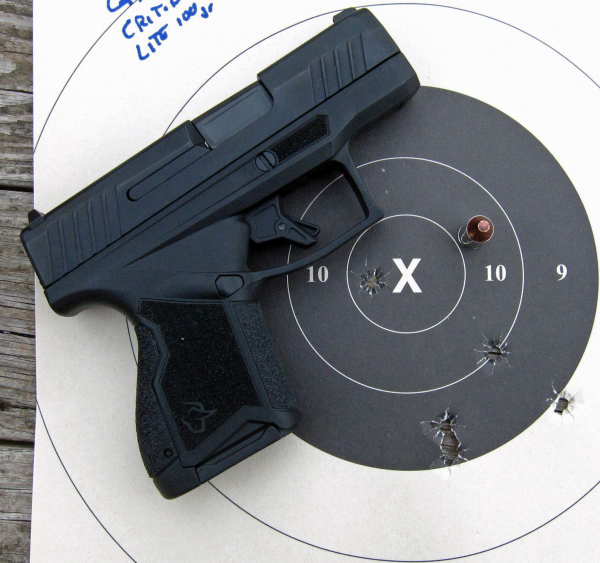
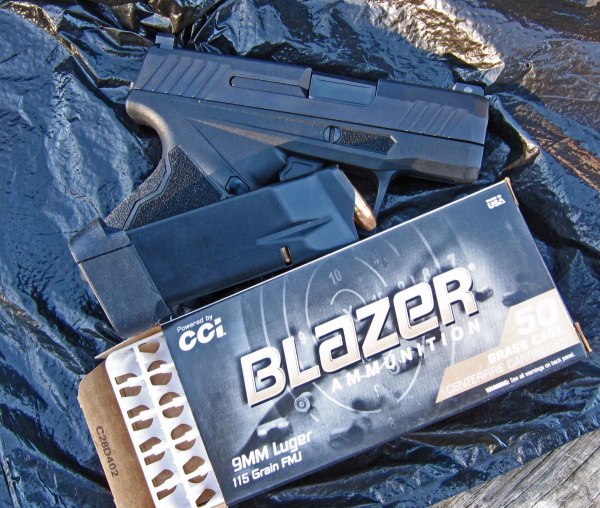
I used CCI Blazer Brass 115gr. FMJ to see where the gun hit with the new sights. I prefer to start at 10 yards on a B-8 repair center, standing unsupported. I held the front sight in the center of the rear sight (as best I can), with the top edge of the front sight two-thirds of the way up the center of the bull. The orange “ball” on the front sight covered the center of the shaded part of the target.
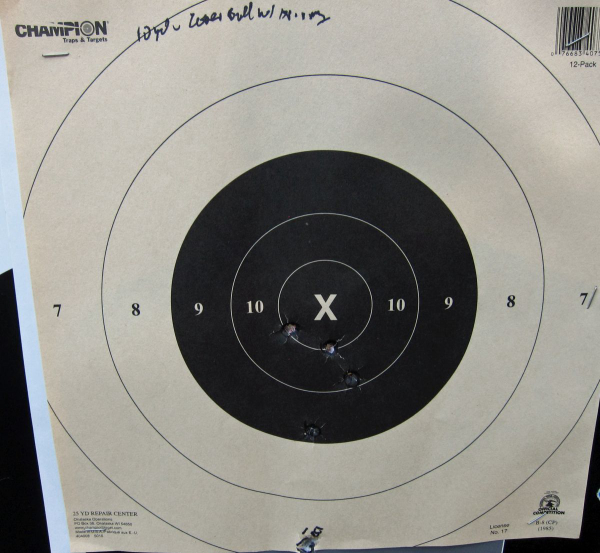
I had one “grip adjustment” miss at 6 o’clock in the “7” ring. There was one hit at 6 o’clock in the “9” ring, one “10” and two inside the “X” ring. It shot center with no windage issues.
From 25 yards, the first five rounds of Winchester “White Box” 115 grain went south of the target. I tried again, holding the “orange” ball ½ way above the rear notch, covering the bull with the front sight. There was a hit in the “7” just outside the “8” ring. A pair appeared around 1-2 o’clock in the 9-ring and a pair in the “8” ring at 6 o’clock.
So – with some ammo, the gun is still hitting under the sights, but not horribly so. All shots were fired from the gun with the factory 13-shot magazine installed. I thought the longer gripping surface would help.
At seven yards, I found that the sights were very visible and that placing the front sight insert over the desired impact point led to hits on target – if I had my grip sorted out.
I intend to keep shooting it and following the Dave Spaulding commandment when using a screw-attached front sight: check the screw tightness at every maintenance stop.
While this project had its challenges, they were small and it was a job worth doing.
-- Rich Grassi